Budget-Friendly Woodworking Projects for Beginners

Budget-Friendly Woodworking Projects for Beginners

Budget-Friendly Woodworking Projects for Beginners

Hey there, woodworking enthusiasts! If you're looking to dip your toes into the world of woodworking without breaking the bank, you've come to the right place. Woodworking can be a rewarding hobby, offering the satisfaction of creating something with your own hands. And the best part? You don't need a fancy workshop or a hefty budget to get started.

In this article, we'll explore some budget-friendly woodworking projects perfect for beginners. We'll delve into simple designs, easily accessible materials, and practical tips to make your woodworking journey smooth and enjoyable. So, grab your tools, get ready to unleash your creativity, and let's get started!

Essential Tools for Beginner Woodworking

Before we jump into the projects, let's talk about the basic tools you'll need to get you going. Don't worry, you can start with the essentials and gradually expand your collection as you gain experience.

  • Measuring Tape: This is your best friend for accurate cuts. Look for one with clear markings and a locking mechanism.
  • Pencil: Essential for marking your cuts and designs.
  • Hand Saw: A good hand saw is versatile for cutting various wood types. Opt for a crosscut saw for straight cuts and a rip saw for cutting with the grain.
  • Hammer: A claw hammer is ideal for driving nails and pulling them out when needed.
  • Screwdriver Set: A set with various sizes of Phillips and flathead screwdrivers will handle most tasks.
  • Safety Glasses: Protect your eyes from flying debris.
  • Work Gloves: These provide protection for your hands and improve your grip on tools.
  • Sandpaper: Essential for smoothing rough edges and achieving a polished finish.

You can find these tools at most hardware stores or online retailers at affordable prices. Don't feel pressured to buy the most expensive tools right away. As you progress, you'll naturally discover which tools are essential for your projects.

Budget-Friendly Woodworking Projects

Now, let's dive into some fun and practical woodworking projects that won't drain your wallet:

1. Simple Wooden Coasters

Coasters are an excellent starting point for beginners. They are small and easy to manage, making them perfect for practicing your cutting and sanding skills.

You can use scrap wood or inexpensive plywood. Start with square or round shapes, and experiment with different designs like simple geometric patterns or even incorporating your initials. Once you've cut your shapes, sand the edges and apply a protective finish like polyurethane or varnish.

2. Wooden Plant Shelf

Give your plants a stylish home with a DIY wooden shelf. This project involves basic cuts and assembly, perfect for building confidence.

Use inexpensive pine boards or plywood to create a simple shelf. Cut the boards to your desired size, sand the edges, and drill pilot holes for easy screwing. You can paint or stain the shelf to match your home decor.

3. Wooden Jewelry Box

This project allows you to showcase your creativity and make a practical gift. Start with a simple box design, using plywood or scrap wood.

Cut out the sides, bottom, and lid. You can add decorative details like a hinged lid or a simple latch. Sand everything smooth and finish it with paint or stain. Add a velvet lining to the inside for a luxurious touch.

4. Wooden Key Holder

A functional and charming key holder is a great way to add personality to your entryway. Choose a piece of wood with interesting grain patterns for a rustic look.

Cut the wood to the desired size and shape. Use a router or a drill to create holes for hanging keys. Sand the edges and apply a finish. You can mount it to the wall using hooks or a simple bracket.

5. Wooden Picture Frame

Showcase your favorite photos or artwork with a DIY wooden frame. Choose from various wood types like pine, oak, or walnut.

Cut the wood to the desired size and shape for the frame. Mitre joints offer a clean finish. Use wood glue and brads or screws to assemble the frame. Sand the edges, and apply a finish.

Tips for Budget-Friendly Woodworking

Here are some helpful tips to keep your woodworking projects budget-friendly:

  • Embrace Scrap Wood: Check with local construction sites or lumber yards for free scrap wood. It's an excellent source for small projects.
  • Consider Reclaimed Wood: Old wooden pallets, furniture, and other items can be repurposed into unique woodworking projects.
  • Use Hand Tools: Hand tools are often less expensive than power tools, and they can be just as effective for smaller projects.
  • Shop Sales and Discounts: Look for deals on tools, wood, and supplies from online retailers and local hardware stores.
  • Learn from Online Resources: There are numerous free woodworking tutorials, videos, and plans available online to guide you through various projects.

Commonly Asked Questions

Here are some answers to common questions about woodworking:

1. What is the best type of wood for beginners?

Pine is an excellent choice for beginners because it's inexpensive, easy to work with, and forgiving. Other budget-friendly options include fir and spruce.

2. How can I learn woodworking without a teacher?

Online resources like YouTube videos, websites, and blogs offer a wealth of information on woodworking techniques and projects. Many free tutorials and courses are available for beginners.

3. What safety precautions should I take when woodworking?

Safety is paramount in woodworking. Always wear safety glasses to protect your eyes from flying debris. Use hearing protection if working with loud power tools. Make sure your workspace is well-lit and free of clutter. And always use a sharp blade to avoid accidents.

4. How can I finish my woodworking projects?

You can use various finishes to enhance the appearance and durability of your woodworking projects. Popular choices include polyurethane, varnish, paint, and stain.

5. Where can I get help if I'm stuck on a project?

Don't hesitate to seek help from online woodworking communities or forums. Woodworkers are generally helpful and eager to share their knowledge and experiences.

Woodworking is a fulfilling and rewarding hobby. By starting with budget-friendly projects, you can gain the skills and confidence to tackle more complex projects in the future. Embrace the journey, learn from your mistakes, and enjoy the process of creating something beautiful and useful with your own hands.

Share:

DIY Wooden Magazine Racks for Craft Fairs and Markets

DIY Wooden Magazine Racks for Craft Fairs and Markets

DIY Wooden Magazine Racks for Craft Fairs and Markets

Craft fairs and markets are a great way to showcase your creativity and earn some extra income. If you're looking for a unique and practical product to sell, consider making DIY wooden magazine racks. These handcrafted items are both stylish and functional, making them a popular choice among shoppers.

The beauty of wooden magazine racks lies in their versatility. They can be customized to suit different styles and spaces, from rustic farmhouse to modern minimalist. By choosing the right wood, stain, and design elements, you can create magazine racks that appeal to a wide range of customers.

This guide will provide you with a comprehensive overview of how to make DIY wooden magazine racks, covering everything from material selection to finishing touches. We'll also discuss marketing strategies and tips for selling your creations at craft fairs and markets.

Materials and Tools

Before you start building your magazine racks, gather the necessary materials and tools. This list is a general guideline, and you may need to adjust it based on your chosen design and available resources.

Wood

  • Pine: A softwood that's affordable and easy to work with. It's a good choice for simple, rustic designs.
  • Oak: A hardwood that's durable and has a beautiful grain pattern. It's suitable for more elaborate designs.
  • Maple: Another hardwood known for its strength and attractive grain. It's ideal for projects that require precise cuts and finishes.
  • Reclaimed wood: Adding a touch of history and character to your magazine racks. This option is environmentally friendly and adds a unique charm.
  • Tools

  • Saw: A circular saw, table saw, or miter saw for cutting wood to size.
  • Drill: For drilling pilot holes and attaching hardware.
  • Screwdriver: For securing screws.
  • Sandpaper: For smoothing wood surfaces and removing imperfections.
  • Measuring tape: For accurate measurements.
  • Clamps: For holding pieces of wood together while gluing or screwing.
  • Wood glue: For bonding wood pieces.
  • Screws: For securing wood joints.
  • Finishing supplies: Stain, paint, varnish, or oil for adding color and protection.
  • Magazine Rack Design Ideas

    The design of your magazine rack will depend on your personal preferences and the target audience. Here are a few ideas to inspire you:

    Classic Rectangular Design

    This simple yet elegant design features a rectangular base with vertical dividers. It's easy to make and suitable for both traditional and modern interiors. Consider adding decorative details like rounded edges or a slightly angled top.

    Angled Shelf Design

    Create a more dynamic look with an angled shelf design. The sloping shelves add visual interest and provide a unique way to display magazines. You can adjust the angle to create a more pronounced or subtle effect.

    Stacked Design

    For a minimalist aesthetic, try a stacked design. This design consists of multiple rectangular shelves stacked on top of each other. Keep the shelves relatively narrow for a clean and uncluttered look.

    Wall-Mounted Design

    Save floor space with a wall-mounted magazine rack. You can create a simple shelf with brackets or use a more intricate design with a back panel. Wall-mounted racks are ideal for smaller spaces or areas where you want to maximize vertical space.

    Building Your Magazine Rack

    Once you have your materials and design in mind, it's time to build your magazine rack. Follow these general steps:

    1. Cut wood to size: Measure and cut your wood pieces based on your chosen design.
    2. Assemble the base: Create the base of your magazine rack by joining the bottom pieces together with wood glue and screws.
    3. Add dividers or shelves: Attach vertical dividers or shelves to the base. Make sure they are spaced appropriately to accommodate magazines.
    4. Secure the top: Attach the top piece to the dividers or shelves.
    5. Sand and finish: Sand down all surfaces to create a smooth finish. Apply stain, paint, varnish, or oil to protect the wood and enhance its beauty.

    Marketing and Selling at Craft Fairs

    Once your magazine racks are complete, it's time to market and sell them at craft fairs and markets.

    Pricing

    Price your magazine racks based on the cost of materials, labor, and your desired profit margin. Consider the quality of wood, complexity of the design, and your target market.

    Presentation

    Present your magazine racks in an appealing and organized manner. Use a table cloth or backdrop that complements your style. Consider using a few sample magazines to showcase the rack's functionality.

    Branding

    Develop a consistent brand for your craft business. Use a logo, business cards, and social media presence to create brand recognition.

    Customer Interaction

    Engage with customers at the fair. Be friendly, informative, and passionate about your creations. Answer questions about your process, materials, and design choices.

    Conclusion

    Making DIY wooden magazine racks is a rewarding and profitable craft. With a little planning and effort, you can create unique and functional pieces that will appeal to customers at craft fairs and markets. Remember to focus on quality craftsmanship, appealing presentation, and strong customer interaction to ensure a successful selling experience.

    Share:

    Top-Selling Picture Frame Styles for Woodworkers

    Top-Selling Picture Frame Styles for Woodworkers

    Top-Selling Picture Frame Styles for Woodworkers

    Picture frames are timeless and universally loved. They elevate cherished memories, adding a touch of elegance and personality to any space. As a woodworker, you have a unique opportunity to craft beautiful and enduring frames that capture the essence of each individual's story. But with so many styles to choose from, knowing which ones are consistently in demand can be crucial for your business success. This article explores the top-selling picture frame styles, giving you insights to cater to diverse customer tastes and trends.

    Classic and Timeless: The Everlasting Appeal

    Some picture frame styles stand the test of time, their elegance and simplicity ensuring enduring popularity. These are the staples of any woodworker's repertoire, and their versatility makes them suitable for various subjects, from family portraits to artwork.

    The Humble and Versatile: The Flat Frame

    The flat frame, a classic design with a simple, unadorned profile, allows the artwork to take center stage. It's a blank canvas for your woodworking skills, welcoming intricate carvings or a sleek, minimalist finish. The flat frame pairs perfectly with a wide range of artwork, from traditional landscapes to modern abstract pieces.

    The Timeless Elegance: The Shadow Box Frame

    The shadow box frame, characterized by its deep profile, creates a sense of depth and dimension. It's perfect for showcasing three-dimensional objects like pressed flowers, fabric scraps, or even vintage memorabilia. The shadow box frame evokes a sense of nostalgia, making it a popular choice for displaying family heirlooms and sentimental treasures.

    Modern and Minimalist: The Sleek and Chic

    Contemporary design trends favor simplicity and clean lines. The following styles embody this aesthetic, appealing to customers who appreciate modern interiors and minimalist decor.

    The Clean Lines: The Gallery Frame

    The gallery frame, known for its narrow profile and understated elegance, adds a touch of sophistication without overpowering the artwork. The absence of ornate details allows the artwork to take center stage, making it a popular choice for displaying contemporary art, photographs, and prints.

    The Bold Statement: The Wide Bevel Frame

    The wide bevel frame, with its dramatic angled profile, adds a touch of visual interest to the artwork. Its bold presence works well for displaying larger pieces or artwork with vibrant colors, creating a focal point in any space. This frame style embraces a modern minimalist aesthetic while making a statement with its distinctive profile.

    Specialized Styles: Meeting Niche Demands

    Beyond the popular classics and modern trends, some specialized styles cater to specific tastes and needs. These frames offer unique features and designs that appeal to niche markets.

    The Decorative Touch: The Ornate Frame

    The ornate frame, with its intricate carvings and embellishments, adds a touch of historical charm and romantic elegance. It's perfect for showcasing antique prints, vintage photographs, or artwork with delicate details. This style caters to customers who appreciate the beauty of craftsmanship and the timeless appeal of decorative elements.

    The Practical Choice: The Collage Frame

    The collage frame, designed to accommodate multiple photographs or artwork, provides a creative and versatile display option. It's ideal for showcasing family memories, travel souvenirs, or a collection of artwork. This style appeals to customers who want to create personalized displays that tell a story.

    By understanding the top-selling picture frame styles, you can refine your woodworking skills and cater to a wider audience. Embrace the classics, explore modern trends, and consider specializing in niche styles to attract customers seeking unique and personalized pieces. Remember, each frame you create is a testament to your craftsmanship and a reflection of your individual artistic vision.

    Share:

    How to Make Wooden Magazine Racks with Clean Lines for a Sleek Design

    Craft a Sleek and Modern Wooden Magazine Rack: A Step-by-Step Guide

    Tired of your magazines cluttering your living space? A stylish and functional magazine rack can be the perfect solution. But why settle for a generic, mass-produced option when you can craft your own with a touch of personality? In this guide, we'll walk you through the process of building a sleek and modern wooden magazine rack with clean lines, adding a touch of sophistication to your home decor. You'll learn how to choose the right materials, cut and assemble the pieces, and finish the rack for a polished look. Let's dive in and build a magazine rack you'll be proud to display.

    Gathering Your Supplies and Tools

    Before you embark on your woodworking adventure, gather the necessary materials and tools to ensure a smooth and enjoyable building process. Here's what you'll need:

    Materials:

    • Wood (e.g., plywood, pine, oak): Select a wood type that complements your existing furniture and desired aesthetic. Plywood offers strength and affordability, while solid wood like pine or oak adds warmth and durability.
    • Wood glue
    • Wood screws (appropriate length for your wood thickness)
    • Wood stain or paint (optional): Choose a finish that matches your style and compliments the wood you've selected.
    • Polyurethane or varnish (optional): A protective layer to enhance durability and add a subtle sheen.

    Tools:

    • Measuring tape
    • Pencil
    • Saw (e.g., circular saw, jigsaw): Choose a saw that allows you to accurately cut the desired wood dimensions.
    • Drill and drill bits
    • Sandpaper (various grits)
    • Clamps
    • Safety glasses
    • Dust mask
    • Gloves (optional)

    Designing Your Magazine Rack

    Before you grab your tools, it's essential to design your magazine rack. Think about the size, shape, and number of compartments you want. Consider how it will fit into your space and the magazines you want to store. For a sleek and modern look, aim for clean lines and minimal embellishments. Simplicity often leads to elegance.

    Choosing the Right Dimensions

    Measure the space where you'll place your magazine rack. Determine the desired width, height, and depth. Remember, the rack should be wide enough to accommodate your magazines and tall enough to support them without tipping over.

    Sketching a Design

    Sketch your design on paper. Experiment with different layouts and compartment configurations. You can create a single, long compartment for stacking magazines, or divide the rack into multiple sections for better organization. Visualize how the rack will look in your space and adjust your design accordingly. Remember, you can always modify your design as you go, but having a starting point helps.

    Cutting and Assembling the Pieces

    Now, it's time to get your hands dirty! With your design finalized and materials ready, you can begin cutting and assembling the pieces of your magazine rack.

    Cutting the Wood

    Using your saw, carefully cut the wood according to your measurements. Make sure all cuts are precise and straight to ensure a clean and professional-looking finish. If you're using plywood, be careful not to splinter the edges. You may want to smooth these edges with sandpaper later.

    Drilling Pilot Holes

    Before you screw the pieces together, drill pilot holes for each screw. This prevents the wood from splitting when the screws are driven in. Choose a drill bit slightly smaller than the diameter of your screws. If you are using a material like plywood, remember to use the proper drill bit for the material you've chosen.

    Securing the Pieces

    Using wood glue and screws, assemble the pieces of your magazine rack. Apply glue to the joining surfaces and clamp the pieces together securely. Make sure the joints are aligned correctly before driving in the screws. Let the glue dry completely before proceeding to the next step. If you're working with plywood or soft wood, you may want to use a countersinking bit for your screws, which creates a recessed hole for your screws and a more professional finish.

    Finishing Touches: Staining, Painting, and Protection

    With your magazine rack assembled, it's time to give it a polished look. You can choose to stain, paint, or leave the wood natural, depending on your desired aesthetic. If you choose to stain or paint, apply the finish evenly and allow it to dry completely. You can use multiple layers of paint to achieve a more opaque finish, or use a sealant to add a touch of shine.

    Sanding for a Smooth Finish

    Before applying any stain or paint, sand the entire surface of the magazine rack with fine-grit sandpaper. This removes any rough edges and creates a smooth surface for the finish to adhere to. Work in the direction of the wood grain for a natural look.

    Applying Stain or Paint

    If you've chosen to stain or paint your magazine rack, use a brush, roller, or spray gun to apply the finish evenly. Use thin, even strokes, and let each layer dry completely before applying the next. For a stained finish, you may want to use a cloth or a rag to wipe away excess stain. Make sure to work in a well-ventilated area and wear appropriate protective gear, like a respirator or dust mask, when sanding or applying finishes.

    Adding a Protective Layer

    Once the stain or paint is dry, consider applying a layer of polyurethane or varnish to protect the wood from scratches and spills. This enhances the durability and longevity of your magazine rack. Apply the sealant evenly using a brush or a cloth. If you're applying multiple layers, make sure each layer dries completely before adding the next. You may want to use a sealant that matches the finish you've chosen. For example, a gloss sealant will enhance a painted finish while a satin finish will work well on a stained finish.

    Enjoy Your New Sleek Magazine Rack

    Congratulations! You've successfully built a beautiful and functional magazine rack. Take a moment to admire your handiwork, and let your friends and family marvel at your craftsmanship. Arrange your magazines neatly on your new rack and enjoy the feeling of organization and sophistication that your creation brings to your home.

    Share:

    Wooden Jewelry Box Plans: Build Your Own Stunning Gift

    Wooden Jewelry Box Plans: Build Your Own Stunning Gift

    Wooden Jewelry Box Plans: Build Your Own Stunning Gift

    Imagine the joy of gifting a beautifully crafted wooden jewelry box, a testament to your skills and care. This isn't just a gift; it's a work of art, a cherished heirloom that will hold memories and treasures for years to come. With the right plans and a dash of woodworking passion, you can build your own stunning jewelry box.

    Choosing the Right Plans

    The first step in this exciting journey is to select plans that align with your vision and skill level. Online resources abound with free and paid plans, each offering unique designs and challenges. Consider the following factors:

    Design Complexity

    Beginners might opt for simpler designs with fewer intricate cuts and joinery techniques. Experienced woodworkers can tackle more elaborate designs with multiple drawers, secret compartments, and intricate carvings.

    Wood Species

    The chosen wood species will influence the final aesthetic and durability. Hardwoods like cherry, walnut, and maple offer elegance and strength, while softwoods like pine or cedar provide a more rustic appeal.

    Functionality

    Determine the desired features, such as compartments for rings, earrings, and necklaces, as well as the overall size and shape of the box.

    Gathering Your Tools and Materials

    Once you've chosen your plans, assemble your woodworking arsenal. Ensure you have the following:

    • Table saw or circular saw
    • Jig saw or scroll saw
    • Hand tools (hammer, chisels, screwdrivers)
    • Measuring tape, pencil, and ruler
    • Sandpaper (various grits)
    • Wood glue
    • Clamps
    • Wood finish (stain, paint, or oil)
    • Hardware (hinges, drawer slides, magnetic closures)

    Step-by-Step Construction

    With tools and materials in hand, embark on the construction process, meticulously following your chosen plans. Here's a general outline:

    Cutting the Wood

    Precisely cut all wood pieces to the specified dimensions using your table saw or circular saw. Utilize a jig saw or scroll saw for intricate curves and designs.

    Joining the Pieces

    Use wood glue and clamps to assemble the box's structure, ensuring precise alignment. Consider using traditional joinery techniques like mortise-and-tenon or dovetail joints for added strength and aesthetics.

    Adding Interior Features

    Craft compartments and drawers to organize jewelry. You can use plywood or thin strips of wood to create dividers and shelves.

    Sanding and Finishing

    Smooth all surfaces with sandpaper, starting with coarser grits and progressing to finer ones. Apply a wood finish of your choice, whether it's stain, paint, or oil, to enhance the wood's natural beauty and provide protection.

    Installing Hardware

    Attach hinges to the lid, drawer slides to the drawers, and magnetic closures for secure closing. Take your time to ensure accurate placement and secure installation.

    Finishing Touches

    Once the box is constructed and finished, add personal touches. Consider incorporating:

    • Engraving or laser etching with initials or special messages
    • Adding decorative hardware like brass accents or handles
    • Inlaying with contrasting wood or mother-of-pearl

    Remember, woodworking is a journey of learning and creation. Embrace the process, celebrate your achievements, and share your handcrafted masterpiece with pride.

    Share:

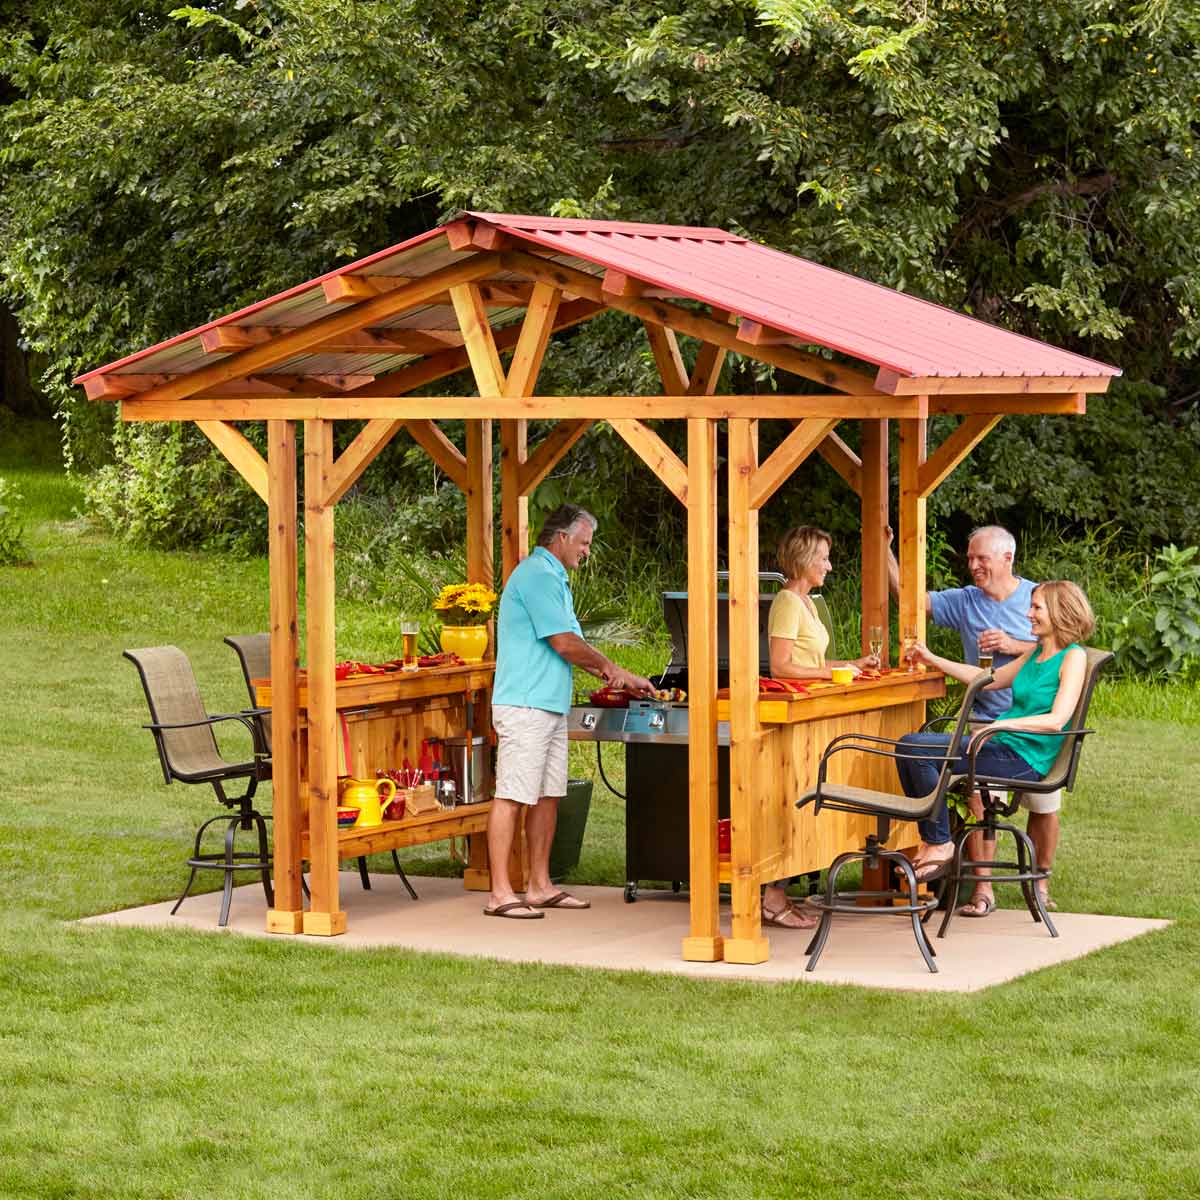
    Grill gazebo diy: how to construct a secure and stylish design

    Grill gazebo diy: how to construct a secure and stylish design

    Building a Grill Gazebo: A DIY Guide to Security and Style

    Transform your backyard into an outdoor oasis with a stylish and secure grill gazebo. Not only will it provide shade and protection from the elements, but it will also enhance your grilling experience and become a focal point for your outdoor gatherings. Building your own grill gazebo allows you to customize the design, size, and features to perfectly suit your needs and budget. Let's dive into the steps to create a grilling haven that you'll love for years to come.

    Planning Your Grill Gazebo: Foundation for Success

    Before you start hammering and sawing, it's essential to plan your grill gazebo. Consider these factors:

    Size and Layout

    Determine the size of your grill and the space you need to move around comfortably. Measure the area where you'll be building the gazebo. Leave ample room for walkways and seating. A general rule of thumb is to have at least 3 feet of clearance around the grill.

    Materials and Style

    Decide on the materials you'll use for your gazebo. Common options include wood, metal, and vinyl. Wood offers a classic and warm look, metal is durable and low-maintenance, and vinyl provides weather resistance. Choose a style that complements your home's architecture and your personal taste. You can find inspiration from online resources, home improvement stores, and design magazines.

    Budget and Time

    Establish a budget and timeframe for your project. Consider the cost of materials, tools, and any professional assistance you may need. Factor in the time required for construction, which can vary depending on your skills and experience. You can always break the project into smaller steps and complete it gradually.

    Essential Tools and Materials

    Gather the necessary tools and materials for a successful grill gazebo construction. Here's a general list:

    • Power drill
    • Measuring tape
    • Level
    • Saw
    • Screwdriver
    • Hammer
    • Safety glasses
    • Gloves
    • Post hole digger
    • Concrete mix
    • Wood or metal framing materials
    • Roofing materials
    • Fasteners (screws, nails, bolts)
    • Paint or stain (optional)

    Building the Structure: A Solid Foundation for Your Gazebo

    Now that you have your plan and materials, it's time to start building:

    Preparing the Site

    Clear the area where you will be building the gazebo. Remove any debris, vegetation, and existing structures. Level the ground using a rake or shovel.

    Setting the Posts

    Use a post hole digger to create holes for the gazebo posts. The depth of the holes should be at least 1/3 of the post's height. Install concrete footings in each hole. Once the concrete has set, attach the posts to the footings using appropriate fasteners.

    Framing the Gazebo

    Cut and assemble the framing beams according to your design. Use a level to ensure that the beams are square and secure them with screws or bolts. Create the roof framework by connecting the beams at the top of the posts.

    Adding the Roof: Protecting Your Grill and Guests

    A sturdy roof is essential for your grill gazebo. Here's how to install it:

    Roofing Materials

    Choose roofing materials that suit your style and budget. Common options include shingles, metal panels, and canvas. Make sure the chosen materials are durable, weather-resistant, and easy to install.

    Attaching the Roofing

    Follow the manufacturer's instructions for attaching the roofing materials to the framework. Make sure to use the correct fasteners and seal the joints for water tightness.

    Finishing Touches: Adding Style and Functionality

    After the roof is in place, you can add finishing touches to enhance the look and functionality of your grill gazebo:

    Side Panels

    Consider adding side panels for privacy and weather protection. You can use wood, metal, or fabric panels. They can be permanently attached or removable depending on your preference.

    Lighting and Electrical

    Install lighting for evening use. Use LED lights for energy efficiency. Consider adding a dedicated electrical outlet for your grill and other appliances.

    Storage and Counter Space

    Include storage shelves, drawers, or a counter space to keep your grilling essentials organized. You can create custom storage solutions or use ready-made cabinets.

    Decoration

    Personalize your grill gazebo with decorative elements. Add plants, hanging lights, or a colorful rug. Use outdoor-friendly fabrics and finishes to complement your style.

    Safety and Maintenance

    Ensure the safety and longevity of your grill gazebo by following these tips:

    • Inspect regularly for any signs of damage or wear.
    • Tighten loose fasteners to maintain structural integrity.
    • Clean and seal wooden surfaces to prevent rot and insect infestations.
    • Check electrical wiring for any loose connections or damage.
    • Store flammable materials properly and away from heat sources.
    • Use caution when grilling and follow fire safety guidelines.

    By carefully planning, constructing, and maintaining your grill gazebo, you'll enjoy a safe and stylish space to create memorable grilling moments with family and friends for years to come.

    Share:

    How to Download Squirrel Den Box PDF Plans

    How to Download Squirrel Den Box PDF Plans

    Building a Squirrel Den Box: Your Ultimate Guide to PDF Plans

    Looking to attract those adorable, bushy-tailed squirrels to your backyard? Building a squirrel den box is a great way to provide them with a safe and cozy home. But where do you even begin? Fear not, fellow nature enthusiast! This guide will walk you through everything you need to know about finding the perfect squirrel den box PDF plans for your project.

    Benefits of a Squirrel Den Box

    Beyond the sheer joy of watching squirrels scamper and play in your yard, a squirrel den box offers numerous benefits:

    • Provides shelter: A secure den box protects squirrels from predators, harsh weather, and the elements.
    • Encourages nesting: It provides a safe and comfortable space for squirrels to raise their young.
    • Adds biodiversity: Attracting squirrels to your yard contributes to a thriving ecosystem and diverse wildlife.

    Finding the Right Squirrel Den Box PDF Plans

    The internet is your treasure trove of squirrel den box plans! Here are some reliable sources to get you started:

    Online DIY Platforms

    Websites like Pinterest, Instructables, and DIY websites often feature detailed plans and step-by-step instructions. Search for terms like "squirrel den box plans," "squirrel house plans," or "squirrel feeder plans" to find a wide range of options.

    Wildlife Organizations

    Organizations dedicated to wildlife conservation, like the National Wildlife Federation or local wildlife sanctuaries, may offer plans tailored specifically for squirrels and their habitats. These resources often provide expert advice on materials, placement, and best practices.

    Professional Woodworking Websites

    Websites specializing in woodworking plans and projects may offer detailed plans for a variety of birdhouses, including squirrel den boxes. These plans can often be customized for your desired dimensions and materials.

    Key Features to Consider in Squirrel Den Box Plans

    When choosing PDF plans, remember to consider the following:

    • Dimensions: Ensure the box is large enough to accommodate a squirrel comfortably and for their nesting activities.
    • Materials: Select durable, weather-resistant materials like cedar, redwood, or pressure-treated wood. Avoid using treated lumber that might release harmful chemicals.
    • Entrance size: The entrance hole should be approximately 3-4 inches in diameter, large enough for squirrels but small enough to discourage larger predators.
    • Ventilation: Make sure the box has proper ventilation to prevent moisture build-up and keep the interior dry.
    • Placement: Choose a location that provides shade, protection from the elements, and easy access for squirrels.

    Building Your Squirrel Den Box

    Once you've selected your PDF plans, gather your materials and tools. Remember to read the instructions carefully and follow them meticulously. You can find helpful guides online for cutting wood, assembling the box, and finishing it properly.

    Building a squirrel den box is a rewarding experience. Not only will you be providing a safe and cozy home for these charming creatures, but you'll also be creating a beautiful and inviting feature for your backyard. Happy building!

    Share:

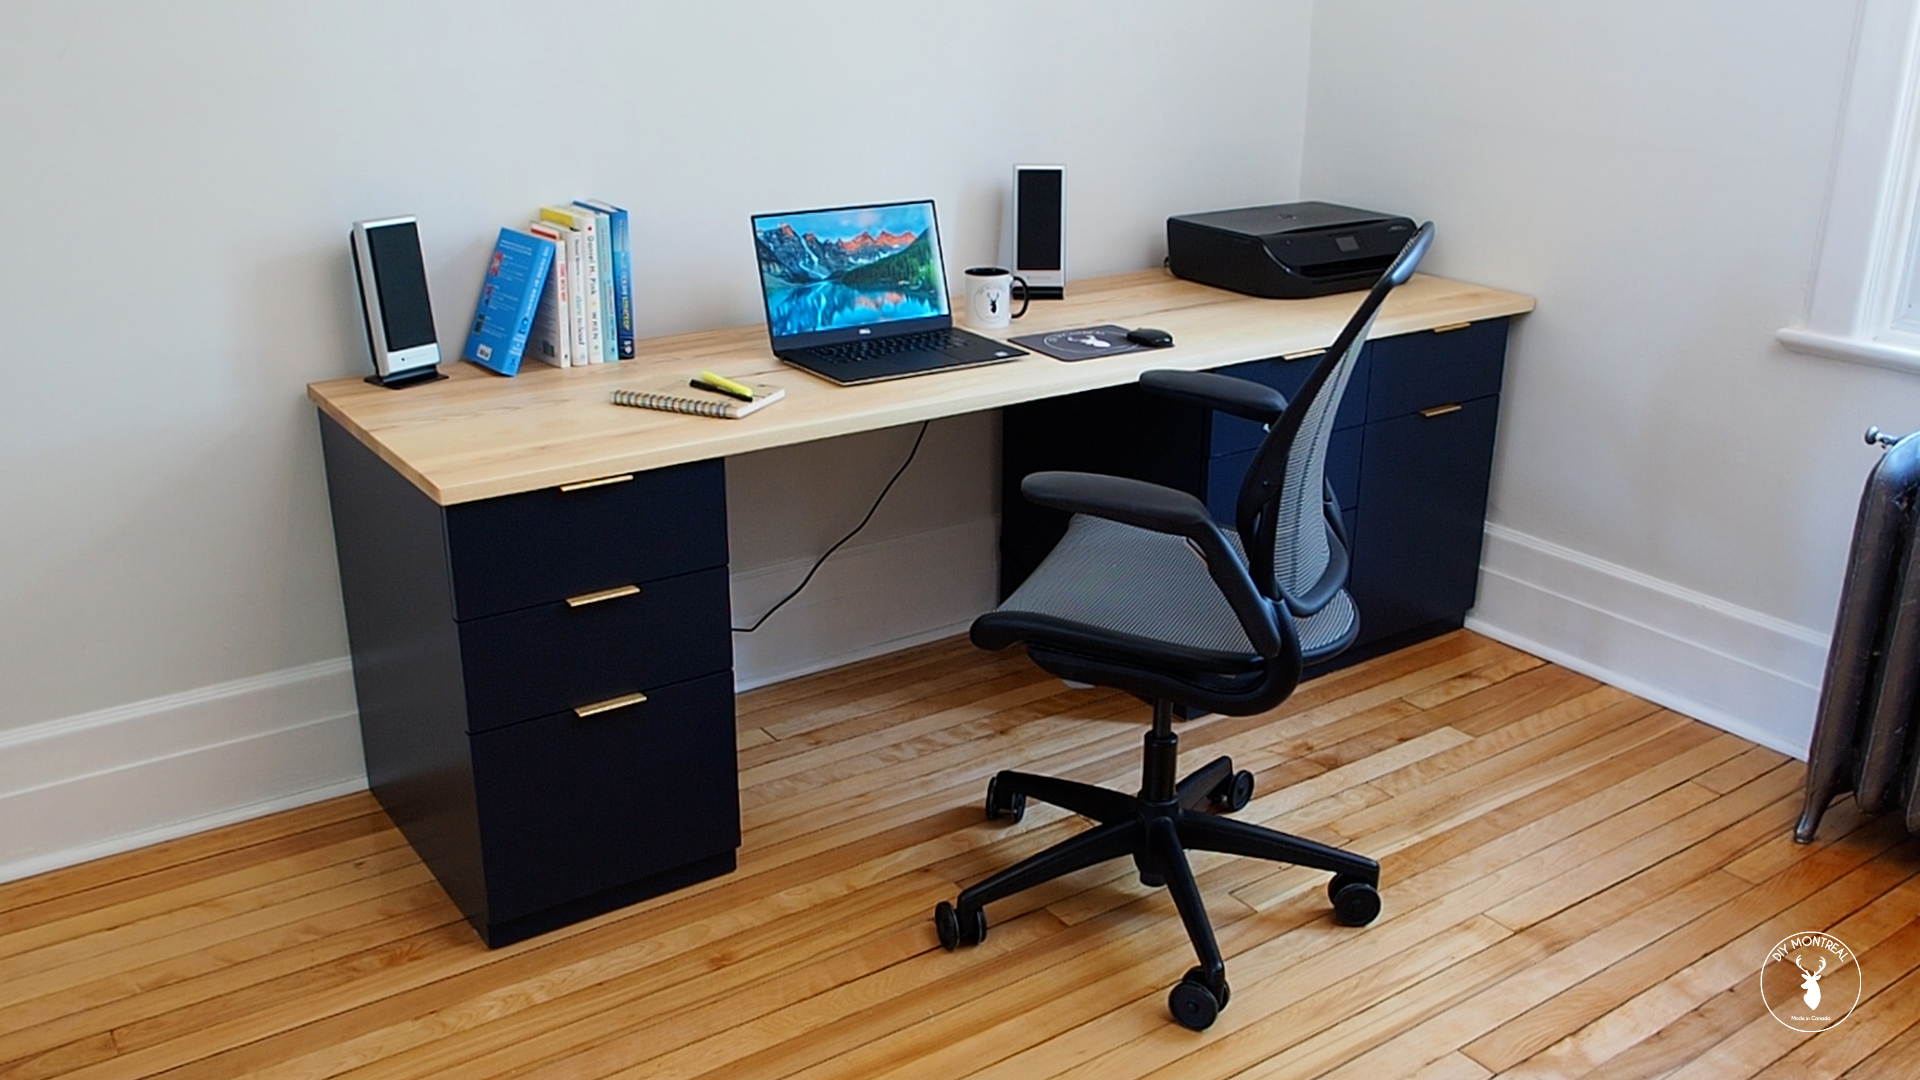
    How to create a wooden desk with a sliding drawer system

    How to create a wooden desk with a sliding drawer system

    Constructing a Wooden Desk with a Sliding Drawer System

    A custom-built wooden desk with a sliding drawer system offers a unique and functional addition to any workspace. This comprehensive guide will equip you with the necessary knowledge and steps to successfully craft such a desk, enabling you to create a personalized piece that complements your individual style and needs.

    Planning and Design

    Determining Dimensions and Functionality

    Start by defining the desired dimensions of your desk. Consider the available space, the intended use of the desk, and your preferred working posture. A comfortable desk height typically ranges from 28 to 30 inches. Determine the length and width based on your workspace requirements and the amount of storage space you need. Think about the number and size of drawers that would best suit your needs.

    Material Selection

    Choose high-quality, durable wood for your desk construction. Popular options include oak, maple, cherry, walnut, and pine, each possessing unique characteristics and aesthetics. Consider the desired weight, color, and grain pattern of the wood when making your selection.

    For the drawer system, opt for sturdy materials like plywood or melamine-coated chipboard for the drawer boxes. These materials offer excellent stability, moisture resistance, and affordability. Solid wood can also be employed for the drawer fronts to enhance the overall look of the desk.

    Designing the Drawer System

    The drawer system is a critical component of your desk. Consider the following factors when designing it:

    • Drawer Size: Determine the number of drawers required, their dimensions, and the intended use of each drawer.
    • Slide Type: Choose between side-mount slides or undermount slides. Side-mount slides are cost-effective and commonly used for lighter drawers. Undermount slides offer smooth extension and higher weight capacity.
    • Slide Extension: Decide on the extension length of the slides. Full-extension slides allow for complete access to the drawer contents, while partial-extension slides offer a more compact design.

    Materials and Tools

    Gather the necessary materials and tools to ensure a smooth construction process.

    Materials

    • Wood for desk top, sides, and legs: Choose your desired wood type and quantity based on the dimensions.
    • Plywood or melamine board for drawer boxes: Select the thickness based on the weight of the items you plan to store in the drawers.
    • Wood for drawer fronts: Opt for solid wood or plywood for a visually appealing finish.
    • Drawer slides: Choose the appropriate type, extension length, and weight capacity.
    • Wood glue: Use a strong, waterproof wood glue for all wood joints.
    • Wood screws: Choose the appropriate size and length for each application.
    • Finish: Select a stain, paint, or oil-based finish to protect the wood and enhance its appearance.
    • Hardware: Acquire drawer pulls, knobs, and any other necessary hardware.

    Tools

    • Table saw: For accurate cutting of wood pieces.
    • Miter saw: For making precise cuts at angles.
    • Circular saw: For cutting large sheets of plywood or melamine board.
    • Jig saw: For cutting intricate shapes and curves.
    • Router: For shaping edges, creating grooves, and other detailing.
    • Drill: For drilling pilot holes and attaching hardware.
    • Screwdriver: For securing screws and other hardware.
    • Clamps: For holding wood pieces securely during assembly.
    • Sandpaper: For smoothing surfaces and preparing them for finishing.
    • Tape measure: For accurate measurement of dimensions.
    • Pencil: For marking cut lines and other details.
    • Level: For ensuring that the desk is level and stable.
    • Safety glasses and hearing protection: Essential for protecting yourself from flying debris and loud noises.

    Construction Steps

    Building the Desk Base

    1. Cut the desk top, sides, and legs to the desired dimensions. Use a table saw or miter saw for accurate cuts.
    2. Assemble the desk top frame. Join the sides to the top with wood glue and screws. Use clamps to hold the pieces together while the glue dries.
    3. Attach the legs to the desk top frame. Position the legs at the desired locations and secure them with wood glue and screws.
    4. Add support rails to the underside of the desk top. Install support rails along the length of the desk top to provide additional strength and prevent sagging.

    Constructing the Drawer Boxes

    1. Cut the drawer box panels from plywood or melamine board. Ensure that the dimensions are accurate and allow for a slight gap between the panels for smooth drawer movement.
    2. Assemble the drawer boxes. Join the drawer box panels with wood glue and screws, ensuring that the joints are tight and secure.
    3. Install the drawer slides. Attach the slides to the sides of the drawer boxes and to the underside of the desk top, following the manufacturer's instructions.
    4. Attach the drawer fronts. Secure the drawer fronts to the drawer boxes with wood glue and screws, aligning them with the slides.

    Finishing the Desk

    1. Sand the entire desk. Use sandpaper of various grits to smooth the surfaces and remove any imperfections.
    2. Apply the desired finish. Stain, paint, or oil the desk according to your chosen finish. Apply multiple coats for optimal protection and durability.
    3. Install hardware. Attach the drawer pulls or knobs to the drawer fronts.

    Additional Considerations

    • Safety: Always wear safety glasses and hearing protection when using power tools.
    • Accuracy: Precise measurements and cuts are essential for a well-constructed desk. Use a tape measure, level, and appropriate tools for accurate results.
    • Finishing: Choose a finish that complements the wood type and your desired aesthetic.

    Conclusion

    Building a wooden desk with a sliding drawer system is a rewarding project that combines craftsmanship with functionality. By carefully planning, selecting appropriate materials, and following these detailed instructions, you can create a personalized desk that meets your unique needs and enhances your workspace. Embrace the process, and enjoy the satisfaction of crafting a piece that reflects your individual style and creativity.

    Share:

    Free Cold Frame Plans for Backyard Gardeners

    Free Cold Frame Plans for Backyard Gardeners

    Free Cold Frame Plans for Backyard Gardeners

    Are you looking for a way to extend your gardening season and give your plants a head start? A cold frame is the perfect solution. These simple structures provide a warm, protected environment for seedlings and other plants, allowing you to start planting earlier in the spring and continue harvesting later in the fall. The best part? Building your own cold frame is easy and affordable. With a few basic materials and some free plans, you can create a cold frame that will enhance your garden for years to come.

    Benefits of a Cold Frame

    Cold frames offer numerous advantages for gardeners, making them a valuable addition to any backyard. Here are some key benefits:

    • Extended Growing Season: Cold frames provide a controlled environment that allows you to start seeds earlier in the spring and extend your harvest into the fall.
    • Protection from the Elements: They shield plants from harsh weather conditions, such as frost, wind, and rain.
    • Improved Seedling Growth: The warm, humid environment inside a cold frame promotes healthy and vigorous seedling growth.
    • Cost-Effective: Building a cold frame is relatively inexpensive, especially compared to purchasing a greenhouse.
    • Easy to Maintain: Cold frames are simple to operate and require minimal upkeep.

    Free Cold Frame Plans

    Numerous resources offer free cold frame plans online. These plans provide detailed instructions and diagrams, making the construction process straightforward. Here are a few reputable websites to check out:

    Materials Needed

    The materials required for building a cold frame vary depending on the design and size. Common materials include:

    • Wood: Lumber, such as cedar, redwood, or pressure-treated pine, is durable and weather-resistant.
    • Plastic: Clear polycarbonate panels or plastic sheeting provides insulation and allows sunlight to penetrate.
    • Hardware: Screws, hinges, and other fasteners are needed for assembly.
    • Soil: Use a high-quality potting mix or garden soil.
    • Optional: Ventilation materials, such as mesh or screens, can be added for better airflow.

    Construction Tips

    Building a cold frame is a relatively simple process. Here are some helpful tips to ensure a successful project:

    • Choose the right location: Select a sunny spot in your garden with good drainage.
    • Measure carefully: Take accurate measurements to ensure all parts fit together properly.
    • Use quality materials: Invest in durable materials that will withstand the elements.
    • Follow the plans: Adhere to the provided instructions to ensure proper construction.
    • Test for ventilation: Ensure the cold frame is adequately ventilated to prevent overheating.

    Maintenance

    Once your cold frame is built, it requires minimal maintenance. Here are some essential tasks:

    • Remove debris: Regularly clear any leaves, twigs, or other debris from the top of the cold frame.
    • Ventilate: Open the vents during warm weather to allow air circulation.
    • Monitor humidity: Check the moisture levels inside the cold frame and water as needed.
    • Protect from pests: Take steps to prevent pests from entering the cold frame.

    With its numerous benefits and ease of construction, a cold frame is an excellent investment for any backyard gardener. By following these free plans and tips, you can create a warm and inviting space for your plants to thrive, extending your gardening season and maximizing your harvest.

    Share:

    Grill gazebo diy: how to build it for year-round use

    Grill gazebo diy: how to build it for year-round use

    Grill Gazebo DIY: How to Build a Year-Round Outdoor Kitchen Haven

    Imagine this: it's a crisp fall evening, leaves are turning vibrant hues, and you're grilling up a storm under a cozy, weather-proof gazebo. The aroma of sizzling food fills the air, and you're surrounded by friends and family enjoying the perfect outdoor dining experience. This isn't just a dream; it's a reality you can build yourself! Building a grill gazebo isn't as daunting as it might seem. With the right tools, materials, and a little bit of DIY spirit, you can create a year-round outdoor kitchen oasis that will become the heart of your backyard.

    Planning Your Grill Gazebo: Where Dreams Meet Reality

    Before you start hammering and sawing, let's get those creative juices flowing! Think about what you want your grill gazebo to be. Are you envisioning a simple, open-air structure for casual gatherings, or a fully enclosed, weather-tight haven for year-round grilling? Here are some crucial factors to consider:

    1. Size and Location: The Foundation of Your Gazebo

    Start by determining the size of your gazebo. Consider the dimensions of your grill, seating arrangements, and any other features you want to include. Don't forget about the size of your backyard and how much space you have to work with. It's also important to choose a location that's flat, level, and free from any obstacles.

    2. Style and Design: Express Your Personal Taste

    Do you prefer a classic wood structure, a modern metal frame, or a rustic combination of both? There's no right or wrong answer; choose the style that best complements your home and personal preferences. Think about the roof design, the type of walls (open, solid, or partially enclosed), and any decorative elements you want to incorporate. Don't be afraid to get creative and make it your own!

    3. Year-Round Functionality: Embrace the Elements

    If you want to use your gazebo throughout the year, consider the climate you live in and how you'll make it weather-resistant. For example, you might want to opt for a solid roof, wind-resistant walls, and a heating system for colder months. There are many options for year-round comfort, such as insulated panels, retractable screens, and even built-in fire pits.

    Materials for Your Grill Gazebo: Building Blocks of your Outdoor Kitchen

    The materials you choose will not only influence the aesthetic but also the functionality and durability of your gazebo.

    1. Frame: The Backbone of Your Structure

    For a classic look, opt for pressure-treated wood for the frame. This will provide years of durability and resist moisture damage. If you want a modern aesthetic or prioritize strength, consider using metal posts and beams. Aluminum is lightweight and rust-resistant, while steel provides incredible strength.

    2. Roof: Shielding Your Space from the Elements

    The roof is the most important part when it comes to year-round use. Here are some common options:

    • **Solid Roof:** A solid roof can be made from various materials, including wood, metal, or even composite. This is the best option for year-round use, providing weatherproof protection from rain, snow, and sun.
    • **Retractable Canopy:** For a combination of sun protection and open-air enjoyment, a retractable canopy is a great choice. It offers shade when needed and allows you to enjoy the open sky when desired.

    3. Walls: Creating an Enclosing Haven

    Your wall choices will depend on your desired level of enclosure and your budget. Here are some popular options:

    • **Screens:** Screens provide excellent airflow and can be rolled up or down for privacy and weather protection.
    • **Panels:** Solid panels can be made from wood, metal, or composite. Choose panels with insulated cores for added warmth in colder months.
    • **Curtains:** Drapes or curtains can be used for aesthetic appeal, privacy, and some weather protection.

    Tools for Your Grill Gazebo Project: Equipment for a Successful Build

    You'll need some essential tools to build your grill gazebo. Here's a list to get you started:

    • **Measuring Tape:** Accuracy is key! Make sure you have a reliable measuring tape for precise measurements.
    • **Level:** A level is essential for ensuring your gazebo is plumb and stable.
    • **Circular Saw:** Used for cutting wood and other materials.
    • **Drill:** For drilling pilot holes and securing screws.
    • **Screwdriver:** A good screwdriver will save you time and energy when fastening components.
    • **Hammer:** Used for driving nails and securing brackets.
    • **Safety Glasses and Gloves:** Protect yourself from debris and potential injuries.

    Steps to Build Your Grill Gazebo: Bringing Your Outdoor Oasis to Life

    Now it's time to roll up your sleeves and start building! Follow these step-by-step instructions to construct your own grill gazebo:

    1. Prepare the Foundation: Laying the Groundwork for Stability

    Start by marking the location of your gazebo using stakes and string. Level the ground, removing any unevenness or obstacles. A concrete pad or patio pavers will provide a sturdy foundation. If you are building on grass, you may want to use gravel or concrete blocks as a base.

    2. Assemble the Frame: Creating the Skeleton of Your Gazebo

    Following your plans, assemble the frame using wood posts, metal beams, or a combination of both. Use brackets, connectors, and screws to secure the frame pieces together. Make sure the frame is plumb and level before proceeding.

    3. Install the Roof: Shielding Your Space

    Attach the roof rafters to the frame. For a solid roof, install plywood sheets or metal panels on top of the rafters. If you are using a retractable canopy, make sure the mounting system is properly installed and secure.

    4. Add Walls: Defining Your Space

    Depending on your chosen wall type, install screens, panels, or curtains. Ensure they are securely attached to the frame. If you are using solid panels, consider adding insulation for warmth in colder months.

    5. Install the Grill: The Heart of Your Outdoor Kitchen

    Once the frame and walls are complete, you can install your grill. Be sure to choose a location that allows for adequate ventilation and is easily accessible. You may want to consider adding a dedicated gas line or a convenient outlet for electrical appliances.

    6. Finishing Touches: Adding Personality and Functionality

    The final steps involve adding the finishing touches that make your gazebo truly unique. This may include:

    • Installing a ceiling fan for cooling on hot days.
    • Adding outdoor lighting for ambiance and evening use.
    • Incorporating a countertop or bar area for prep work and serving food.
    • Hanging decorative elements such as lanterns or planters.

    Tips for Year-Round Use: Maximizing Your Outdoor Kitchen

    To make your grill gazebo a true year-round haven, consider these tips:

    • **Insulation:** Adding insulation to the walls and roof can significantly improve warmth in the colder months.
    • **Heating:** A propane heater, outdoor fireplace, or even a built-in fire pit can keep you cozy during chilly evenings.
    • **Weatherproofing:** Seal any cracks or gaps in the walls and roof to prevent water damage and drafts.
    • **Maintenance:** Regular cleaning and maintenance will extend the life of your gazebo. Protect wood surfaces with sealant and clean metal components to prevent rust.

    Safety Considerations: Building with Confidence

    Building a grill gazebo is a rewarding project, but safety should always be your top priority. Here are some essential safety tips:

    • **Follow Building Codes:** Make sure your gazebo complies with local building codes for structural integrity and safety.
    • **Use Appropriate Tools:** Use the right tools for the job and ensure they are in good working condition.
    • **Wear Safety Gear:** Always wear safety glasses, gloves, and appropriate footwear when working.
    • **Securely Fasten Components:** Make sure all screws, bolts, and fasteners are properly installed and secure.
    • **Fire Safety:** Keep a fire extinguisher readily available and be mindful of potential fire hazards.

    Building your own grill gazebo is a fantastic way to create a personalized outdoor kitchen that you'll enjoy for years to come. With careful planning, the right materials, and a bit of DIY spirit, you can transform your backyard into a year-round haven for entertaining, dining, and creating unforgettable memories. So grab your tools, get creative, and start building your own outdoor oasis!

    Share:

    Maximize Your Bedroom Space with a DIY Bedside Cabinet (Free PDF)

    Maximize Your Bedroom Space with a DIY Bedside Cabinet (Free PDF)

    Maximize Your Bedroom Space with a DIY Bedside Cabinet (Free PDF)

    Tired of cramped bedside tables and overflowing drawers? Don't let a small bedroom limit your storage solutions! With a little creativity and some basic DIY skills, you can build a stylish and functional bedside cabinet that perfectly complements your space. We've put together a comprehensive guide with clear instructions and a free downloadable PDF to help you create the perfect bedside companion.

    Why Build Your Own Bedside Cabinet?

    Building your own bedside cabinet offers several advantages over purchasing a pre-made one:

    • Customization: You have complete control over the size, shape, style, and materials. This allows you to create a piece that perfectly fits your needs and bedroom aesthetic.
    • Cost-Effectiveness: DIY projects often save you money compared to buying a ready-made cabinet. You can source affordable materials and avoid the mark-up associated with retail products.
    • Personal Touch: Adding your own flair and finishing touches creates a unique piece that reflects your personality and style.
    • Sense of Achievement: Completing a DIY project offers a rewarding sense of accomplishment and allows you to showcase your skills.

    Planning Your DIY Bedside Cabinet

    Before diving into the construction, take some time to plan your project. This will ensure a smooth and successful build:

    1. Determine Your Needs and Space:

    • Consider the available space next to your bed and the desired size of your bedside cabinet.
    • Think about the storage needs you want to address, such as books, nightlights, or personal items.

    2. Choose Your Materials:

    • Select sturdy materials like plywood or solid wood for the cabinet's structure.
    • Consider the style you want to achieve. Rustic wood, painted finishes, or sleek laminates offer a variety of options.

    3. Sketch a Design:

    • Draw a simple sketch of the cabinet's dimensions and features, including shelves, drawers, and any unique details.
    • This visual guide will be helpful during the construction process.

    4. Gather Your Tools and Supplies:

    • Assemble the necessary tools, including a saw, drill, screwdriver, tape measure, level, and sandpaper.
    • Prepare the required materials, such as wood, screws, hinges, drawer slides, paint or stain, and finishing touches.

    Free PDF Download for Detailed Instructions

    Ready to start building your dream bedside cabinet? We've created a comprehensive guide packed with step-by-step instructions, helpful tips, and detailed diagrams. Download our free PDF below and let's get building!

    [Insert Link to Downloadable PDF Here]

    Enjoy Your New Bedside Oasis

    With our DIY guide, you'll be surprised how easy it is to create a custom bedside cabinet that perfectly complements your bedroom and enhances your sleep sanctuary. Enjoy the satisfaction of a successful project and the convenience of a well-organized space. Happy building!

    Share:

    Diy corner desk with shelving: complete woodworking plan

    Diy corner desk with shelving: complete woodworking plan

    Building Your Dream Corner Desk with Shelves

    Hey there, fellow DIY enthusiast! Ready to tackle a project that will not only give you a functional workspace but also a unique piece of furniture? Let's build a corner desk with shelves! This project will be rewarding, and the satisfaction of creating something with your own two hands is truly priceless.

    Materials and Tools

    Before diving into the building process, we need to gather our supplies. You'll need:

    Wood

  • 2x4s for the frame and shelves
  • Plywood or MDF for the desktop
  • Optional: 1x2s for trim
  • Hardware

  • Wood glue
  • Screws (2 1/2" and 1 1/2")
  • Corner brackets (optional)
  • Casters (optional)
  • Finishing nails or brads
  • Wood filler (optional)
  • Stain or paint (optional)
  • Polyurethane or varnish (optional)
  • Tools

  • Saw (circular saw or jigsaw)
  • Drill
  • Driver
  • Tape measure
  • Pencil
  • Level
  • Clamps
  • Safety glasses
  • Dust mask
  • Planning and Design

    The beauty of a DIY project is that you can customize it to your liking. Take some time to plan your desk:

    Size and Shape

  • Measure the corner space where you plan to place the desk. Determine the desired width and depth of your desktop. Consider the space needed for your computer monitor, keyboard, and other essentials.
  • Shelf Configuration

  • Decide how many shelves you want and their heights. Think about what you'll be storing on them - books, files, office supplies, or maybe even a printer?
  • Additional Features

  • Do you want to add a drawer or a cable management system? Consider these features during the planning stage.
  • Cutting the Wood

    Now, let's get our hands dirty! Time to cut the wood according to your measurements:

    Frame

  • Cut four pieces of 2x4 for the legs, two for the front and two for the back. These pieces will be the height of your desk.
  • Cut two pieces of 2x4 for the front and back crosspieces, the length of your desktop minus the thickness of the two leg pieces.
  • Cut two pieces of 2x4 for the side crosspieces, the depth of your desktop minus the thickness of the two leg pieces.
  • Shelves

  • Cut the plywood or MDF for your desktop to the desired size.
  • Cut 2x4s for each shelf to the length you determined, ensuring they fit comfortably within the frame.
  • Optional Trim

  • If you are using 1x2s for trim, cut them to the desired lengths for the edges of the desktop and the shelves.
  • Assembling the Frame

    With your wood pieces cut, we can start building the frame of the desk:

    Legs

  • Lay the two front leg pieces and two back leg pieces on a flat surface.
  • Apply wood glue to the ends of the leg pieces and attach the front crosspiece to the top of the legs. Secure with screws.
  • Repeat on the other side with the back crosspiece.
  • Use clamps to ensure the frame is square before the glue dries.
  • Sides

  • Attach the side crosspieces to the frame, securing them with glue and screws. Ensure the side pieces are flush with the front and back crosspieces.
  • Shelves

  • Measure the distance between the legs and cut the shelf supports to fit snugly within the frame.
  • Attach the shelf supports using glue and screws. Use a level to ensure the shelves are even.
  • Attaching the Desktop and Shelves

    We're getting closer to the finish line! It's time to attach the desktop and shelves:

    Desktop

  • Apply glue to the top of the frame and place the desktop on top.
  • Secure the desktop using screws from underneath. Make sure the screws are long enough to go through the desktop and into the frame.
  • Shelves

  • Place the shelves on the shelf supports and secure them with screws from below.
  • Finishing Touches

    We're nearly there! Let's put the finishing touches on our corner desk masterpiece:

    Optional Trim

  • If you are using trim, attach it to the edges of the desktop and shelves using finishing nails or brads. Apply wood filler to any nail holes.
  • Sanding

  • Sand the entire desk with fine-grit sandpaper to smooth out any rough edges and prepare it for staining or painting.
  • Finishing

  • Apply stain or paint, following the manufacturer's instructions. You can also choose to use a clear finish like polyurethane or varnish to protect the wood and enhance its natural beauty.
  • Optional Features

  • Add corner brackets to provide extra support to the frame.
  • Install casters to make your desk easy to move around.
  • Congratulations!

    You did it! You've successfully built your very own corner desk with shelves. Take a moment to admire your craftsmanship and enjoy the fruits of your labor. This desk will be a perfect addition to your home office, providing you with a functional and stylish workspace for years to come. Now that you've conquered this project, you can unleash your inner DIYer and customize your desk even further. Add some personal touches, like a decorative backsplash or a built-in organizer, to truly make it your own. Remember, the possibilities are endless!
    Share:

    Diy grill gazebo: how to use eco-friendly materials for construction

    Diy grill gazebo: how to use eco-friendly materials for construction

    Building a DIY Grill Gazebo with Eco-Friendly Materials

    A grill gazebo is an excellent addition to any backyard, providing shade, protection from the elements, and a dedicated space for grilling and entertaining. But why not build your gazebo with a focus on sustainability and eco-friendly materials? Not only will you be reducing your environmental footprint, but you'll also be creating a space that is both beautiful and functional.

    Choosing Eco-Friendly Materials

    When selecting materials for your grill gazebo, consider the following options for a sustainable approach:

    Wood

    Opt for reclaimed or sustainably harvested wood for the frame and supports of your gazebo. Reclaimed wood has a lower environmental impact than newly harvested timber, as it gives a second life to existing resources. Look for certified sustainable woods like FSC-certified lumber to ensure it comes from responsibly managed forests.

    Bamboo

    Bamboo is a fast-growing, renewable resource that can be used for the frame, supports, and even roofing. It is lightweight, durable, and naturally resistant to insects and rot.

    Recycled Materials

    Get creative and incorporate recycled materials into your design. Metal or plastic shipping pallets can be repurposed as building elements or even decorative accents. Look for recycled lumber or composite decking materials for the flooring and roof.

    Fabric

    Choose canvas or other natural fabrics for the roof and side panels. These materials are breathable and offer good shade. Select fabrics that are water-resistant and durable for long-lasting use.

    Construction Techniques

    Building a gazebo from eco-friendly materials requires careful planning and execution. Consider the following tips:

    Minimalist Design

    Aim for a simple design that uses minimal materials. Focus on essential features like a sturdy frame, roof, and side panels. This will minimize waste and simplify construction.

    Proper Framing

    Ensure the frame is structurally sound to support the roof and withstand weather conditions. Use sturdy wood or bamboo, and consider reinforcing joints with metal brackets.

    Securing the Roof

    Secure the roof to the frame with durable, weather-resistant fasteners. Consider using screws or metal clips rather than nails, which can loosen over time.

    Finishing Touches

    Once the gazebo is built, treat the wood with a natural oil or stain to protect it from the elements. Avoid harsh chemicals or paints that can harm the environment.

    Sustainable Features

    Enhance the sustainability of your grill gazebo by incorporating additional eco-friendly features:

    Solar Lighting

    Install solar-powered lights for evening illumination. This will eliminate the need for electricity and create a cozy ambiance.

    Water Collection

    Consider adding a rainwater collection system to capture water for gardening or other uses.

    Greenery

    Plant climbing vines or flowering shrubs around the base of the gazebo to provide additional shade and create a natural atmosphere.

    Building an eco-friendly grill gazebo requires a bit of extra effort, but the benefits are worth it. By using sustainable materials and construction techniques, you can enjoy a beautiful and functional outdoor space that minimizes your environmental impact.

    Share:

    Build Your Own Squirrel Den Box: Complete Guide

    Build Your Own Squirrel Den Box: Complete Guide

    Build Your Own Squirrel Den Box: Complete Guide

    Welcome to the world of squirrel den box building! Creating a cozy and safe haven for these charming creatures is a rewarding experience. In this guide, we'll walk you through each step, equipping you with the knowledge and confidence to construct a squirrel den box that's both functional and aesthetically pleasing. Let's get started!

    Choosing the Right Location and Materials

    The success of your squirrel den box hinges on selecting the perfect location and materials. Let's delve into the specifics:

    Location

    Squirrels love to be high up, so choose a location at least 10 feet off the ground. This will provide them with a safe haven from predators. A sturdy tree with strong branches is ideal. Consider placing the box on the southern or eastern side of the tree for optimal sunlight exposure.

    Materials

    For a long-lasting and weather-resistant den box, opt for durable materials like:

    • **Cedar or Redwood:** These woods are naturally resistant to rot and insects, ensuring your den box withstands the elements.
    • **Pressure-Treated Pine:** A cost-effective alternative, pressure-treated pine is resistant to decay and moisture.
    • **Metal:** A metal squirrel den box offers even greater durability, but it might be slightly more challenging to build.

    Remember to avoid using toxic paints or preservatives, as these can be harmful to the squirrels.

    Designing Your Squirrel Den Box

    Now, let's create a comfortable and safe abode for our furry friends:

    Dimensions

    A standard squirrel den box is about 12 inches wide, 12 inches deep, and 18 inches high. Make sure the entrance hole is about 4 inches in diameter, large enough for the squirrel to enter comfortably, but small enough to deter larger predators.

    Features

    Here are some key features to include in your design:

    • **Ventilation:** Drill some small holes in the sides or back of the box to allow for air circulation.
    • **Roof overhang:** Extend the roof slightly to protect the entrance from rain and snow.
    • **Removable Lid:** A removable lid will allow you to clean the box regularly and observe the squirrels from a safe distance.

    Building the Squirrel Den Box

    With your design finalized, you're ready to embark on the construction process:

    Cut the Wood

    Begin by cutting your wood to the desired dimensions. Use a saw to create the sides, back, front, and roof panels. Be sure to create a rectangular opening for the entrance on the front panel.

    Assemble the Box

    Securely join the pieces together with screws or nails. Predrill holes to prevent the wood from splitting. It's a good idea to use waterproof glue to reinforce the joints.

    Install the Roof

    Attach the roof to the box, ensuring it's securely fastened. If you've opted for a removable lid, attach it with hinges for easy access.

    Finish the Box

    Apply a weather-resistant sealant or paint to the box to protect it from the elements. This step is optional, but it will enhance the longevity of your den box.

    Installing and Maintaining Your Squirrel Den Box

    Now, let's get your cozy haven ready for its furry inhabitants:

    Mounting

    Use strong brackets to mount the box securely to the tree. Make sure the box is level and the entrance is facing the direction you want the squirrels to enter.

    Cleaning

    Clean the box regularly, especially during nesting season (spring). This will help prevent disease and keep the squirrels healthy. Removing any debris or old nest materials is a good practice.

    Conclusion

    Congratulations! You've successfully built a delightful squirrel den box. With your expert craftsmanship, you've created a safe and cozy haven that will surely attract these playful and energetic creatures. Now, sit back, relax, and enjoy the delightful antics of your newfound furry neighbors.

    Share:

    How to Upcycle Furniture into a Stylish Bedside Cabinet

    How to Upcycle Furniture into a Stylish Bedside Cabinet

    Transforming Old Furniture into a Stylish Bedside Cabinet

    Tired of the same old bedside table? Or maybe youรข€™re on a tight budget and looking for an affordable and stylish solution? Upcycling old furniture is a fantastic way to create unique, personalized pieces and give a new life to items that might otherwise end up in a landfill. Let's explore how to turn an old piece of furniture into a stylish bedside cabinet.

    Choosing the Right Furniture

    The first step is to find the perfect furniture piece. You can use a variety of items, such as an old dresser, an antique chair, a vintage suitcase, or even a small table. Think about the size you need for your bedside table. A small nightstand might be perfect for a narrow space, while a dresser could hold more items. Look for sturdy pieces with good structural integrity that you can easily re-purpose.

    Refurbishing and Restoring

    Once youรข€™ve selected your furniture, you can start to make it your own. Hereรข€™s a step-by-step guide to refurbishing and restoring:

    Cleaning and Preparation

    Start by cleaning your furniture thoroughly with a mild soap and water solution. This will remove any dirt, grime, or old finishes. Sanding the surface is optional but is highly recommended for a smooth, even finish.

    Painting or Staining

    Choose a paint or stain that complements your bedroom decor. You can use a variety of colors and finishes, from classic white to bold accent colors. Apply paint or stain evenly, allowing it to dry completely. You may need to apply multiple coats for a durable finish.

    Hardware and Finishing Touches

    New hardware can make a big difference! Update your bedside cabinet with new handles, drawer pulls, or knobs. You can also add additional features, like shelves, a small drawer, or a mirror, to give it extra functionality.

    Creative Ideas for Bedside Cabinet Upcycling

    Here are some creative ideas to inspire you:

    • Transform an old ladder into a unique bedside table by adding shelves and a top surface.
    • Create a vintage-inspired bedside cabinet from an antique suitcase. Add legs, a top surface, and personalize it with your favorite decorative elements.
    • Repurpose an old sewing machine table into a functional bedside cabinet with drawers and a charming design.

    Finishing Touches

    Once your bedside cabinet is ready, add a few finishing touches to give it personality. Consider placing a lamp, a vase with flowers, or a decorative tray on top. Add a soft throw blanket for warmth, or a framed photograph to showcase your style.

    Conclusion

    Upcycling furniture is a rewarding and sustainable way to add style and personality to your bedroom. You can create a truly unique and beautiful bedside cabinet by transforming an old piece of furniture into something new and exciting! So, get creative and have fun with the process.

    Share:

    DIY Birdhouse: How to Build It with Sturdy Materials

    DIY Birdhouse: How to Build It with Sturdy Materials

    DIY Birdhouse: Building a Sturdy Home for Feathered Friends

    Attract beautiful birds to your backyard with a charming and sturdy birdhouse you build yourself. This DIY project is rewarding and lets you create a customized haven for feathered friends. Let's get started!

    Choosing the Right Materials

    The key to a long-lasting birdhouse is choosing durable materials. Here's what you'll need:

    Wood

    Select a rot-resistant wood like cedar, redwood, or pressure-treated pine. Avoid using plywood, which can deteriorate quickly in the weather.

    Hardware

    You'll need screws, nails, hinges (if you want a removable roof), and a drill with bits for wood.

    Paint or Stain

    Optional, but a coat of paint or stain protects the wood from the elements and adds a personalized touch. Choose bird-friendly colors and finishes.

    Building the Birdhouse

    Follow these steps to construct a sturdy and inviting birdhouse:

    1. Cut the Wood Pieces

    Cut your wood to the desired size based on your birdhouse design. Here's a typical birdhouse breakdown:

    • Bottom (base): 6" x 6"
    • Sides (2): 6" x 6"
    • Front (including entry hole): 6" x 6"
    • Back: 6" x 6"
    • Roof (2 pieces): 6" x 8"

    2. Assemble the Base

    Attach the sides to the bottom using wood glue and screws or nails. Create a strong and secure base.

    3. Attach the Front

    Attach the front piece to the sides using glue and screws or nails. Before securing the front, drill the entry hole. The size depends on the bird species you want to attract. For example, a 1 1/2" hole is suitable for chickadees and titmice.

    4. Add the Back

    Secure the back piece to the sides and bottom using glue and fasteners.

    5. Create the Roof

    Attach the two roof pieces to the top of the birdhouse, creating a slight overhang to protect the interior. Use hinges if you prefer a removable roof for easy cleaning.

    6. Finishing Touches

    Apply paint or stain to your birdhouse if desired. Let the finish dry completely before placing the birdhouse.

    Placing Your Birdhouse

    Choose a suitable location for your birdhouse:

    • Height: Place it 5-10 feet off the ground.
    • Sun & Shade: Aim for a spot with partial shade and protection from direct sun.
    • Facing: Position it facing away from prevailing winds.
    • Safety: Make sure it is secure and free from predators.

    Enjoy watching feathered friends settle into their new, sturdy home! Remember to keep the birdhouse clean and provide a source of fresh water nearby.

    Share:

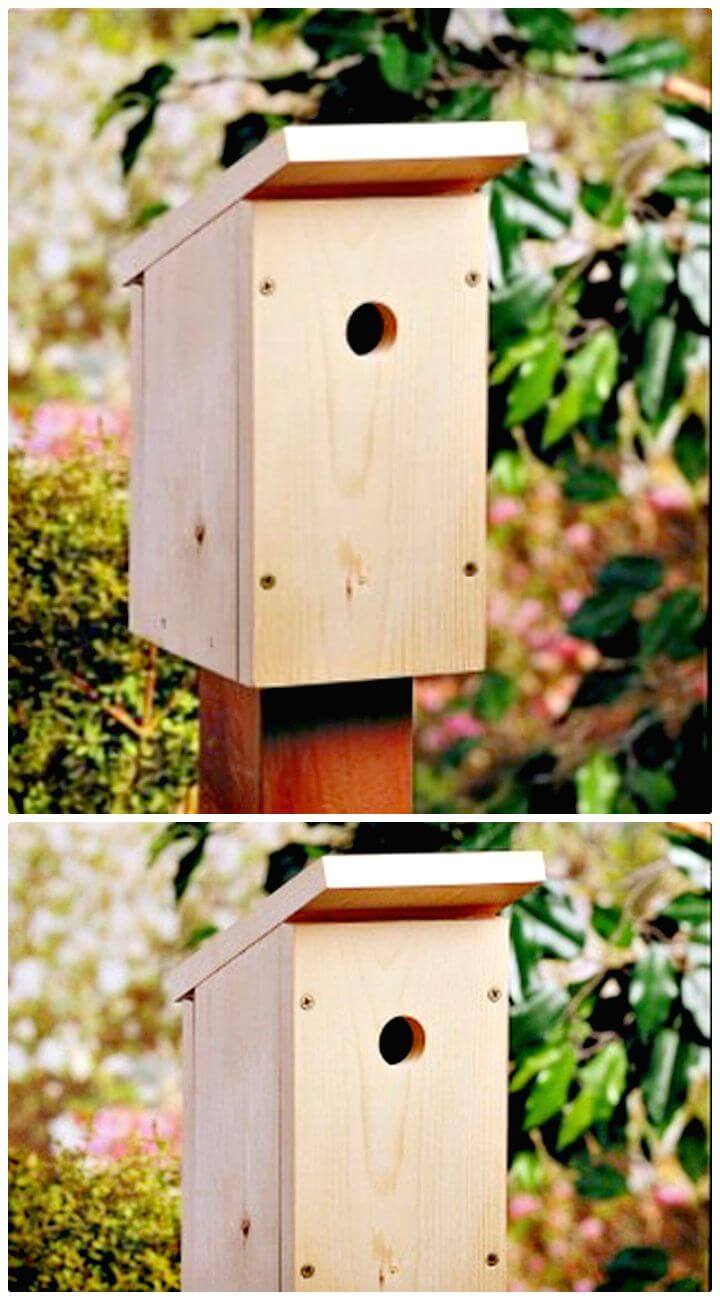
    How to Build a Birdhouse with a Tilted Roof for Easy Cleaning

    How to Build a Birdhouse with a Tilted Roof for Easy Cleaning

    Build a Birdhouse with a Tilted Roof for Easy Cleaning

    Hey there, bird lovers! Ready to make your backyard a haven for feathered friends? Building a birdhouse is a rewarding project, but let's be honest รข€" nobody wants a messy, unhygienic home for our avian buddies. That's why we're going to build a birdhouse with a tilted roof, making cleaning a breeze!

    Why a Tilted Roof?

    A tilted roof is key for a few reasons. Think of it like this:
    • Easy Clean-up: A tilted roof allows rain to naturally wash away debris, keeping the inside of the birdhouse dry and clean.
    • Better Drainage: The tilt ensures that water doesn't pool inside the birdhouse, which can lead to mold, mildew, and other health hazards for the birds.
    • Protection From Pests: A tilted roof makes it harder for critters like squirrels and raccoons to access the nest.

    Let's Get Started!

    Materials You'll Need

    * **Wood:** Choose a durable wood like cedar, redwood, or pine. I recommend using 1/2-inch thick boards. * **Screws:** Use screws that are long enough to securely attach the wood pieces. * **Saw:** A hand saw, jigsaw, or circular saw will work. * **Drill:** A drill is essential for making pilot holes, which helps prevent the wood from splitting. * **Measuring Tape:** You'll need this to ensure accurate cuts. * **Pencil:** For marking your wood. * **Sandpaper:** Use sandpaper to smooth out rough edges and give the wood a finished look. * **Paint or Stain:** Optional, but it adds a decorative touch and protects the wood. * **Birdhouse Entrance Plate:** You can find these at most hardware stores or online.

    Building Your Birdhouse

    Okay, let's build! Here's a step-by-step guide: **1. The Base:**
    • Cut four pieces of wood to be the sides of your birdhouse base. These pieces should be the same length and width.
    • Cut two pieces of wood for the front and back of the base. These pieces should be the same width as the side pieces, but their length should be slightly longer.
    • Attach the side pieces to the front and back pieces using screws, creating a rectangular box.
    **2. The Roof:**
    • Cut two pieces of wood for the roof panels. These pieces should be the same width as the base of your birdhouse and slightly longer in length.
    • Attach the roof panels to the back of the base with screws.
    • Use screws to attach the front of the roof panels, creating a tilted roof. The angle of the tilt should be about 15-20 degrees.
    • To create a more finished look, you can add a ridge board to the top of the roof.
    **3. The Entrance:**
    • Cut a hole in the front of your birdhouse for the entrance. The size of the hole depends on the type of birds you want to attract. Check online resources for recommended sizes.
    • Attach a birdhouse entrance plate around the entrance hole. This plate helps protect the birds from predators.
    **4. Finishing Touches:**
    • Sand the entire birdhouse, smoothing out any rough edges.
    • Apply paint or stain to protect the wood and add color.
    • Let the paint or stain dry completely before placing your birdhouse outside.

    Choosing a Location for Your Birdhouse

    • Height: Position your birdhouse at a height that's safe from predators and easy for the birds to access. Around 5-8 feet is ideal.
    • Direction: Face the entrance of your birdhouse away from prevailing winds and rain.
    • Shelter: Choose a location that offers some shade from the sun.
    • Visibility: Try to place your birdhouse in a location that is visible to the birds.
    • Water Source: Birds need water, so make sure there is a source of water nearby.

    Tips for Attracting Birds

    You've built the perfect birdhouse, now let's attract those feathered friends! Here are some tips:
    • Choose the Right Size: Select a birdhouse that is designed for the type of birds you want to attract.
    • Place It in a Suitable Location: Follow the location tips above.
    • Provide a Water Source: A birdbath or shallow dish of water will attract birds.
    • Offer Food: A bird feeder filled with seeds or suet will entice birds to your yard.
    • Be Patient: It may take some time for birds to discover your birdhouse, so don't give up!

    Enjoy Your Birdhouse!

    Congratulations! You've now built a birdhouse that's not only beautiful but also easy to clean. Watching birds come and go from your creation is a joy, and knowing you're providing them with a safe and healthy home is even better. Happy birding!
    Share:

    Woodworking magic box project for beginners and experts

    Woodworking magic box project for beginners and experts

    Unleash the Magic: Building a Wooden Mystery Box

    Dive into the world of woodworking and craft a mesmerizing wooden mystery box. This project, perfect for beginners and seasoned woodworkers alike, combines simplicity with a touch of magic. Imagine the look on someone's face as they open your creation and discover a hidden treasure within. Let's embark on this enchanting journey together!

    The Magic Begins: Gather Your Tools and Materials

    Before we delve into the enchanting construction, let's gather the essential tools and materials:

    Materials:

    • Wood: Choose your favorite type รข€" pine, oak, walnut, or even plywood. Aim for boards with a thickness of ร‚½ inch to ร‚¾ inch.
    • Hinges: Two strong hinges, ideally brass or nickel plated for a touch of elegance.
    • Magnetic catches: To keep the secret secure.
    • Wood glue: A strong bond to ensure durability.
    • Finishing materials: Stain, paint, varnish, or oil for a personalized look.
    • Optional: A small treasure or trinket to conceal inside the box.

    Tools:

    • Measuring tape: For precise dimensions.
    • Pencil: For marking the wood.
    • Saw: A handsaw or jigsaw for cutting the wood.
    • Sandpaper: Various grits for a smooth finish.
    • Drill: For creating holes for the hinges and magnetic catches.
    • Screwdriver: To secure the hinges and catches.
    • Clamps: To hold the wood securely during assembly.

    Constructing the Enchanting Box: Step-by-Step Guide

    Now that you have your tools and materials ready, let's build our magic box. Each step unfolds like a magical spell, bringing us closer to our enchanted creation.

    Step 1: The Box Base

    • Using the measuring tape, mark out the dimensions of your box base on the wood. For a beginner-friendly size, aim for a 6-inch by 6-inch square. You can adjust the size according to your preference.
    • Carefully cut out the base using your saw.
    • Sand the edges of the base with fine-grit sandpaper for a smooth finish.

    Step 2: The Sides

    • Measure and mark the four sides of the box. The sides should be the same height as you desire for the box. For a standard height, aim for 3 inches.
    • Cut out the four sides using your saw. Make sure the cuts are straight and precise for a clean box.
    • Sand all edges of the sides with fine-grit sandpaper.

    Step 3: Assembling the Box

    • Apply wood glue to the edges of the base and carefully attach the four sides. Make sure the sides are aligned with the base and form a perfect right angle.
    • Use clamps to hold the box together while the glue dries. Allow the glue to dry completely according to the manufacturer's instructions.
    • Once the glue is dry, remove the clamps and inspect the box for any imperfections. Use wood filler to fix any gaps or cracks.

    Step 4: Adding the Hinges

    • Decide on the location for your hinges. Typically, they are placed on the side of the box opposite the lid. Use a pencil to mark the hinge locations.
    • Drill pilot holes at the marked locations using a drill bit slightly smaller than the hinge screws.
    • Attach the hinges to the box using the screws, ensuring they are securely fastened.

    Step 5: Creating the Lid

    • Cut out a piece of wood that matches the dimensions of the base. This will serve as the lid of the box.
    • Attach the second hinge to the lid, mirroring the hinge placement on the box.
    • Sand the edges of the lid to a smooth finish.

    Step 6: Adding the Magic Touch: Magnetic Catches

    • Select the location for your magnetic catches. One should be placed on the lid, the other on the box. Mark the location using your pencil.
    • Drill pilot holes at the marked locations, taking care not to drill all the way through the wood.
    • Using a screwdriver, attach the magnetic catches to the lid and box. Make sure the magnets align properly.

    Step 7: The Finishing Touches

    • Sand the entire box, including the lid, with fine-grit sandpaper to create a smooth, even surface.
    • Apply your chosen finish - stain, paint, varnish, or oil. Multiple coats are recommended for durability.
    • Allow the finish to dry completely before handling the box.

    Unlocking the Magic: Adding a Personal Touch

    The true magic lies in the personalization of your wooden mystery box. Add an element of surprise to your creation. You can:

    • Carve intricate designs onto the wood for a unique touch.
    • Paint the box with vibrant colors and patterns.
    • Incorporate a hidden compartment within the box for an extra layer of surprise.
    • Choose a secret treasure to place inside - a small token, a love letter, a cherished photograph, or anything else that holds meaning.

    The Enchantment Continues: Sharing Your Creation

    With your completed wooden mystery box, you've not only built a beautiful piece of craftsmanship, but you've crafted a vessel of wonder and delight. Share your magic with loved ones, watch their eyes light up as they discover the treasures within. The joy of creating, sharing, and surprising รข€" that is the true magic of woodworking.

    Share:

    Diy guide to building a wooden gun cabinet for firearm display

    Diy guide to building a wooden gun cabinet for firearm display

    Building a Wooden Gun Cabinet for Firearm Display: A DIY Guide

    Alright, gun enthusiasts, let's talk about a project that combines practicality and aesthetics: building a custom wooden gun cabinet to showcase your prized firearms. You'll be surprised how achievable this is, even if you're a beginner woodworker. This guide will walk you through the process, from planning to finishing, ensuring you create a secure and stunning display for your collection.

    Planning Your Gun Cabinet

    Before diving into the woodshop, it's crucial to plan your project thoroughly. Think about your needs and preferences. What size and style will complement your space and collection?

    Size and Dimensions

    Determine the dimensions of your cabinet based on the size of your firearms and the space you have available. Consider the following:

    • Number of guns: How many firearms do you plan to display?
    • Barrel length: Measure the longest barrel you'll be storing.
    • Height: Determine the ideal height for easy access and display.
    • Depth: Allow enough depth for comfortable storage, considering any optics or accessories.

    Sketch out a rough design, considering the number of shelves, drawers, and any additional features like glass doors or internal lighting. You can even use a woodworking software program to create a 3D model for visualization.

    Style and Design

    Think about the style you want. Do you prefer a classic, rustic, or modern look? Some popular styles include:

    • Traditional: Solid wood, ornate carvings, and a rich finish.
    • Rustic: Reclaimed wood, distressed finishes, and visible knots.
    • Modern: Clean lines, minimalist design, and sleek finishes.

    Research online for inspiration, browsing through images of gun cabinets to gather ideas for shelves, doors, hardware, and overall design elements. You can even combine styles for a unique look.

    Materials and Tools

    Now, let's gather the materials and tools you'll need. Don't be intimidated; most of these are commonly available at hardware stores and online retailers.

    Wood

    Choose a durable hardwood like oak, walnut, maple, or cherry. These woods are known for their strength, beauty, and longevity. Softwoods like pine or cedar can also be used, but they might not be as resistant to scratches or dents. Consider the following factors:

    • Thickness: Aim for 3/4 inch thickness for shelves and cabinet sides.
    • Grain pattern: Choose wood with a consistent grain for a visually appealing finish.
    • Moisture content: Ensure the wood is kiln-dried to prevent warping or cracking.

    Tools

    You'll need basic woodworking tools for this project. If you're new to woodworking, consider borrowing some tools from a friend or renting them. You can find most of these tools at your local hardware store:

    • Table saw: For cutting wood to size.
    • Miter saw: For precise angle cuts.
    • Circular saw: For cutting large pieces of wood.
    • Drill: For drilling pilot holes and attaching hardware.
    • Screwdriver: For securing screws and other hardware.
    • Router: For shaping edges and creating decorative details.
    • Sandpaper: For smoothing surfaces and preparing for finishing.
    • Clamps: For holding wood pieces together during assembly.
    • Level: For ensuring level shelves and cabinet sides.
    • Tape measure: For accurate measurements.
    • Safety glasses and ear protection: Always prioritize safety!

    Construction Steps

    Let's get into the construction process. Remember to work in a well-ventilated area and follow safety guidelines.

    Cutting and Assembling the Cabinet

    1. Cut the wood: Using your table saw or miter saw, cut the wood to the dimensions you planned for the cabinet sides, top, bottom, shelves, and any dividers. Remember to account for the thickness of the wood when making cuts.

    2. Assemble the sides and back: Join the cabinet sides and back using wood glue and screws. Pre-drill pilot holes to prevent wood splitting. Clamp the pieces together until the glue dries.

    3. Attach the shelves: Cut and attach shelves to the sides using wood glue and screws. Ensure they're level and securely fastened.

    4. Add dividers: If you're incorporating dividers to separate sections, cut them to size and attach them to the shelves or cabinet sides using the same method.

    Adding Doors and Hardware

    1. Cut and attach doors: If you want doors for your cabinet, cut the wood to size and attach them using hinges. You can use pre-made door panels or cut your own. Remember to choose hinges that match the style of your cabinet.

    2. Install locks and handles: Attach locks and handles to the doors. Consider using keyed locks for security and choosing handles that complement the cabinet's design.

    Finishing Touches

    1. Sanding: Sand all surfaces of the cabinet using progressively finer grits of sandpaper to remove any rough edges or imperfections.

    2. Applying finish: Choose a finish that suits your style, such as a stain, paint, or varnish. Follow the manufacturer's instructions for application and drying time.

    3. Adding embellishments: You can add decorative elements like moldings, trim, or carvings to enhance the cabinet's aesthetics.

    Safety and Security Considerations

    It's essential to prioritize safety and security when building a gun cabinet.

    Securing the Cabinet

    1. Locking mechanism: Install a robust locking mechanism with a secure key or combination lock. Consider a lock with multiple locking points for added security.

    2. Anchoring: Securely anchor the cabinet to the wall or floor using heavy-duty anchors or bolts to prevent theft or accidental tipping.

    3. Concealment: Consider adding a discreet alarm system or a hidden camera to enhance security.

    Responsible Firearm Storage

    1. Storage practices: Always store firearms unloaded and with the action open.

    2. Separate ammunition: Store ammunition separately from firearms, preferably in a locked container.

    3. Childproof: If you have children, ensure the cabinet has a childproof lock or is placed out of their reach.

    Enjoy Your Custom Gun Cabinet

    Congratulations! You've now built a stunning and functional gun cabinet to display your prized firearms. Remember to always handle firearms responsibly and follow all local laws and regulations. Take pride in your craftsmanship and enjoy the security and aesthetics of your custom-built gun cabinet.

    Share:

    Popular Posts

    Cari Blog Ini

    Powered by Blogger.

    Label

    Arsip Blog

    Recent Posts

    Pages